Scirocco Rear View Camera Installation

As my NV2428 navigation unit supports a Rear View Camera, I elected to install the OEM Scirocco III bumper mounted camera. This does not entail any major body modifications, such as those required to install a Golf 6 / Polo 6R badge flipper camera.

I also wanted to keep the camera centrally mounted, so did not want to use the type that are integrated in a replacement number plate light.

This modification only requires a hole to be drilled /filed in the plastic bumper for the Scirocco camera mount to clip into.

In fact, during my installation, I did not even take the bumper off the car.

There are a number of similar cameras available on different model VW's, but selecting a Scirocco specific version means that the guidelines on the navigation screen are correctly matched to the viewing perspective height and angle that it is mounted at.

Additionally, I have found that the camera lens remains surprisingly clean where it is mounted and is also barely noticeable.

Note that there are also a number of Scirocco cameras available, so it is important to get the correct version for your headunit!

We are really only interested in the first two versions that came on the pre-facelift version Scirocco III.

Firstly, there is an RGB version, which requires the headunit to have separate Red, Green and Blue signal input connections.

The second version only has a composite video cable (coaxial) with the "VIDEO +" and "VIDEO -" connections.

The cameras used on the facelift Scirocco III were changed to match the newer Composite Media headunits fitted to those models and the earlier cameras do not work on them.

In the case of the humble Mk IV, I would suggest sticking to the earlier versions I have listed below, as they should work with any aftermarket radios as well.

Mounting Camera in Rear Bumper

The Scirocco camera is mounted in the centre between the two number plate lights. In my installation, I elected to run the wires to the right hand side of the car so that the camera cable runs up the right hand side of the car.

I cut the hole for the camera mount without needing to remove the bumper bar. I did, however, make sure the wiring for the right numberplate light does not sit inside the bumper in the area where I was drilling, so that the wires did not get tangled up when I was drilling through the bumper skin.

Carefully measure the position for the camera mount, making sure it does not stick out and will stay under the lip of the bumper. There is some margin to position it backwards or forwards slightly, but the hole itself needs to be fairly precise for it to clip in correctly.

Refer to the photo sequence below showing how I made the hole.

Once hole was cut I ran the harness along the top of the rebar to the grommet on right hand side. It is secured with four of these 3D0 971 838 L tie wraps that have a metal securing clamp on them that fits perfectly onto the flange of the rebar.

Harness & Wiring Information

The connector plugs used on the Scirocco Rear View Camera are reversed between the RGB and the Composite video versions, so the "opposite" plugs are required for each camera (detailed separately in Parts List)

In the Scirocco installation, the plugs are externally mounted under the rear bumper, so they come with waterproof connectors and FAKRA plugs.

On the .:R32, the camera cable is long enough to run through a convenient blanking grommet at the right rear side of vehicle (directly under sunroof drain plugs grommet)

You may wish to run the wires through an existing grommet and seal it, but there is also a replacement factory grommet 1J0 971 913 A available to fit in the hole with a proper waterproof tube built into it

Once the harness is inside the car, the Scirocco uses another premade harness to run from the back of the car to the factory headunit.

Because the composite video version has the opposite plug to this main harness, it has to use another short adapter cable as well to mate to this main harness.

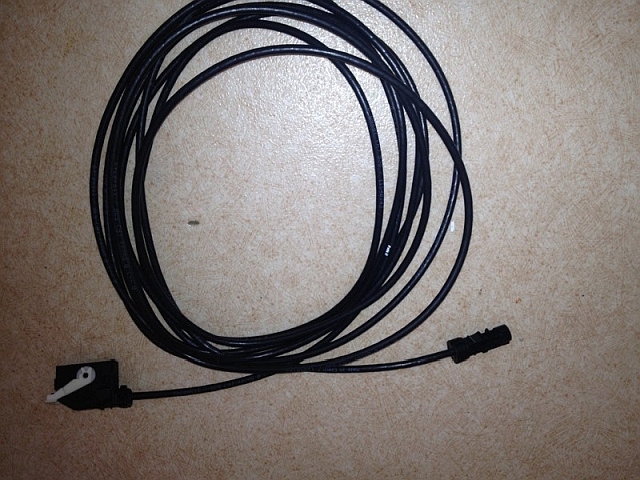
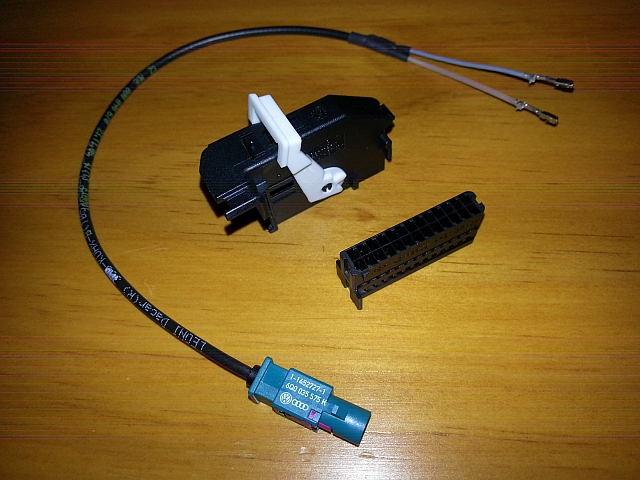
To avoid all these complications, I cut off the waterproof FAKRA plug and installed a normal FAKRA plug that will now be internally connected and mate directly to the purchased 5-metre repair cable 000 098 656 to run from inside hatch area to the headunit along the right side sill panel.

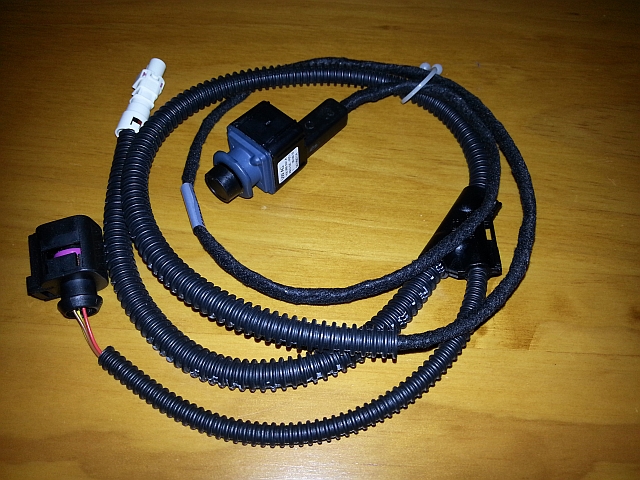
This is my modified Scirocco camera harness with converted FAKRA connectors and grommet for rear beaver panel under right tail light:

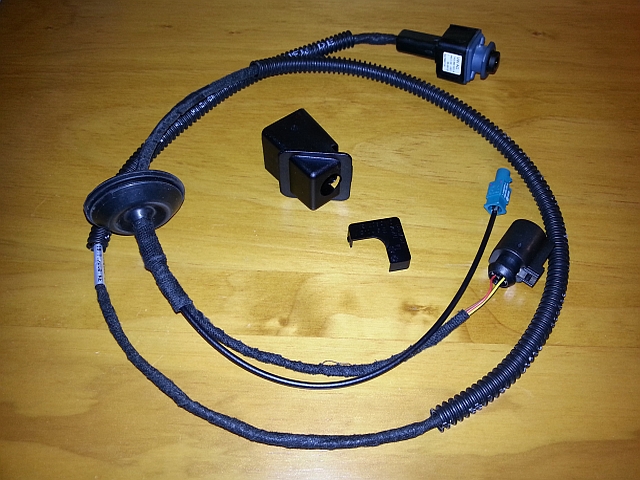
Compare this to the photo in Parts List to see how I have modified it from standard.

Many vendors sell FAKRA plugs to do this type of conversion, but you also need a special pair of pliers to strip and crimp the wiring ends correctly.

Mouser now sell the proper Rosenberger (OEM supplier) coaxial FAKRA's in all the proper coded colours:

Link here for Rosenberger connectors.

They are identical to the generic water blue coloured "universal" FAKRA plugs that VW can supply.

The specific green FAKRA plugs for the coaxial cables that I used are Rosenberger 59Z113-000E (female) and 59Z064-000E male.

The Scirocco camera also requires a separate four pin plug for the required power, negative and reverse feed to work. All these connections are available in rear of vehicle.

Original Scirocco wiring goes to a normal 30+ feed. Not sure why 30+ is specified, possibly a throwback to the wiring used in Golf's with flipper camera in rear handle, which would require 30+ for their operation to close the flipper handle after ignition is switched off.

I chose to use the T23/20 feed located in the rear hatch light supply, which is controlled by the Comfort Module as my power supply for the camera. This connection is disabled once the car is locked, so there is no excess drain on the battery from the camera.

Original pinouts on Scirocco camera are:

Pin 1 = Red = Fused 30+

Pin 2 = Brown = Earth 31

Pin 3 = Vacant

Pin 4 = Yellow = Reverse signal (RL)

Reverse can be obtained from rear light assembly and earth goes to earthpoint on left C-pillar.

If you obtain a 2-pin plug number 1J0 972 702 it can be plugged directly into the one of the sockets on the right rear tail light housing to pick up the "RF" reverse signal without cutting any other wires (refer to diagram here for all the available connections).

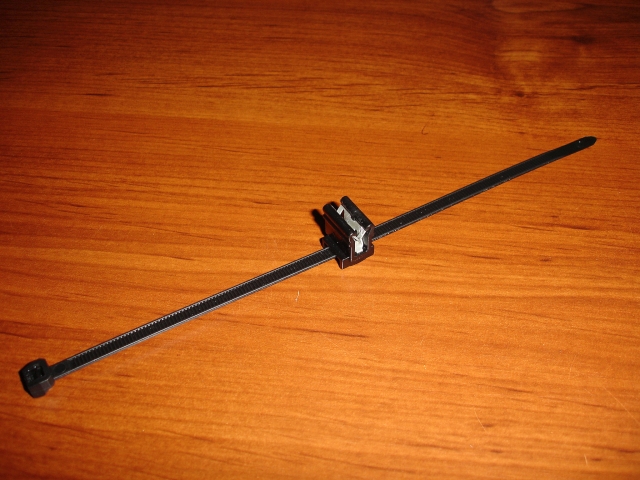
I found this aerial cable holder 1K0 937 545 M to secure the FAKRA plug connection from the camera that I clipped into an existing spare sheetmetal hole near the tail light and locked in place with a random circlip (as this particular hole was slightly too big for the cable holder).

The cable to the front then runs up over the wheel arch and is taped to the existing harness in there, following the main harness behind the quarter panel and along the right sill panel, then up the A-pillar and across to the head unit.

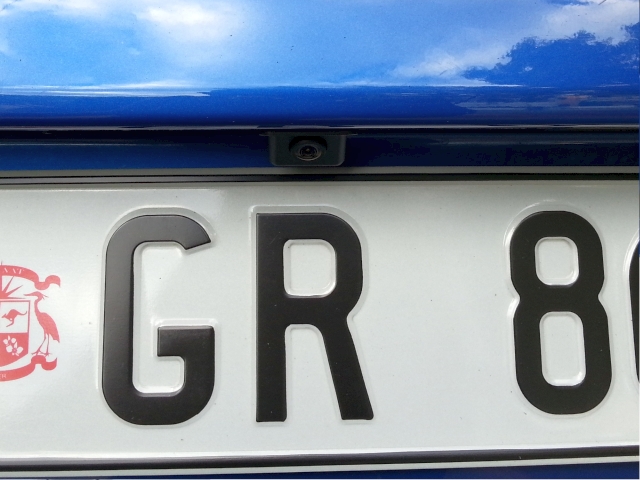
Then after all that hard work, you end up with this:
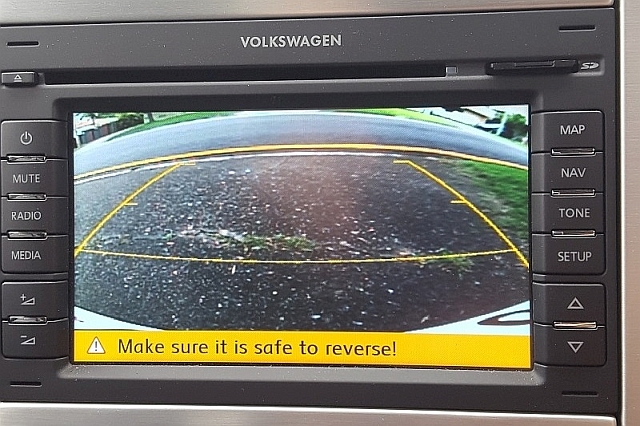
Parts List

RGB version:

1K8 980 551           RGB version (Europe) with "female" 4-pin waterproof FAKRA HSD data cable connector

4B0 973 812          4-pin plug to adapt camera harness to car harness

1K8 035 550          5280mm length harness with "male" 4-pin waterproof FAKRA HSD data cable.

This cable ends in a black 26-pin Molex plug with RGB connections.(to suit RNS-510 etc)

Composite video version:

1K8 980 551 A         Composite video version (Japan market) with "male" 4-pin waterproof FAKRA coaxial cable connector

7L0 973 812           4-pin plug to adapt camera harness to car harness

000 979 020 E          Repair wire for 7L0 973 812 plug

000 098 712 A         1-metre adapter cable for Japanese market camera to convert waterproof FAKRA supplied with camera to the generic 5-metre coaxial cable below

000 098 656              5-metre coaxial cable

You then require another small adapter cable to convert the above cable, using a "male" FAKRA on one end convert to the specific connection you require for your head unit, for example an RCA plug perhaps.

In the case of my NV2428, I needed the 000 098 670 A adapter which has a "male" FAKRA coaxial cable end ending in 2 x 000 979 009 repair wires for my "VIDEO +" and "VIDEO -":

3W0 807 210 B         Camera mount for bumper bar

3W0 807 151             "Fixing clip" to secure camera in camera mount

1J0 971 913 A           Rubber grommet for hole in beaver panel under tail light

Return to Top

Return to Home Page